STEPS TO A POLLINATOR PARKWAY
DESIGN, PLANNING AND LAYOUT
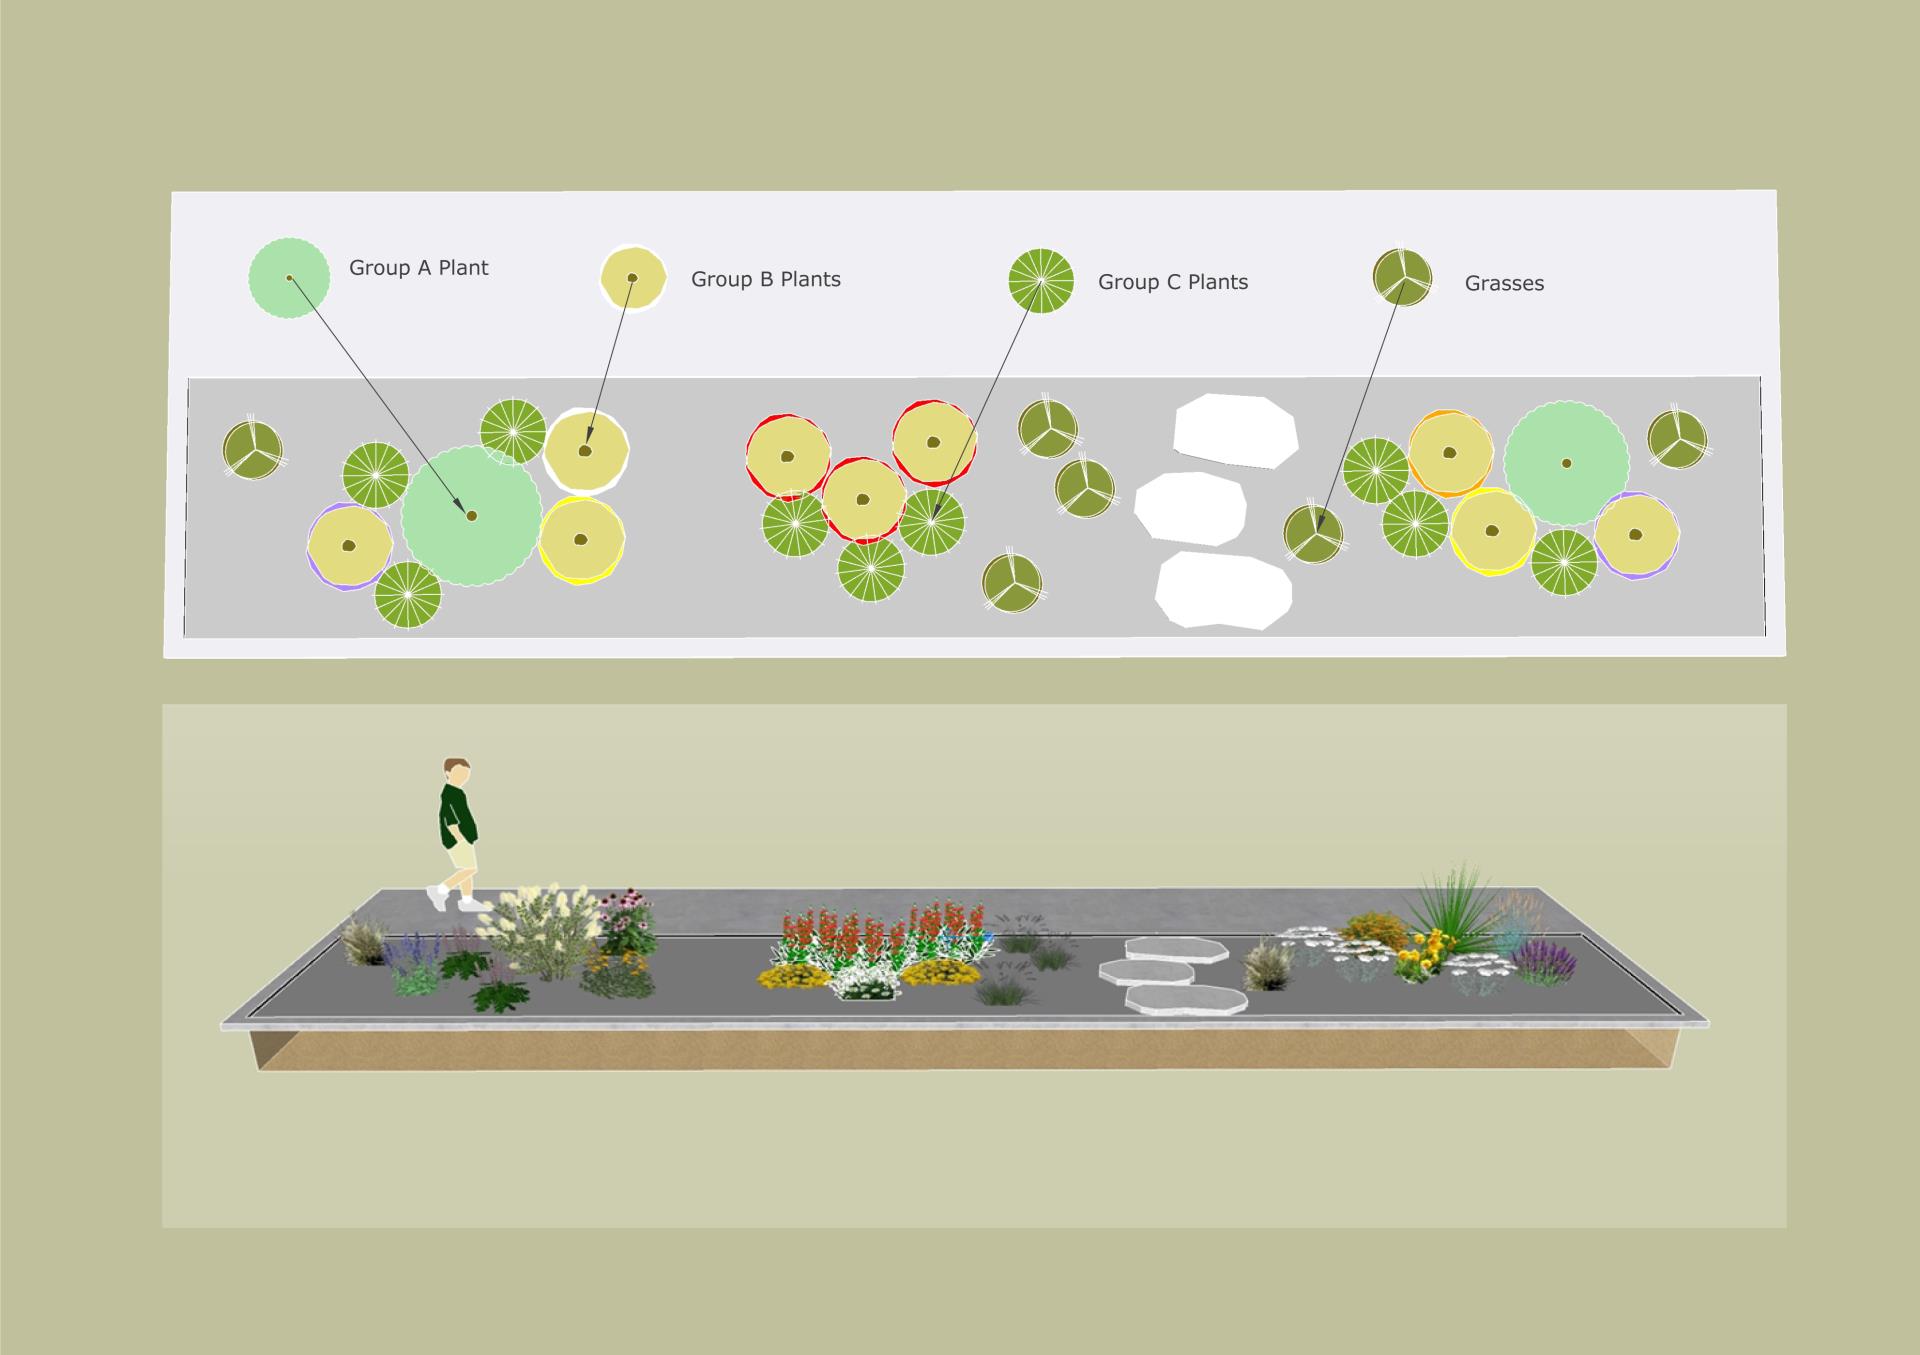
Parkway Strips are home to various utilities and are part of the public right of way. Planting packages will provide a 25-30% plant cover for every 300 square feet; a balance between aesthetic appeal and satisfying access requirements. Mature plantings should not block pedestrian and vehicle sight lines and there must be access to sidewalks and walkways. Group A plants are largest and can act as a focal point, group B plants are intermediate in size and placed from the center outward, and Group C plants are lower growing and suitable closer to edges. If a higher density of plantings is desired, try creating larger groupings of individual species.
Pollinator Parkway Design Example
Pollinator Parkway Plant List
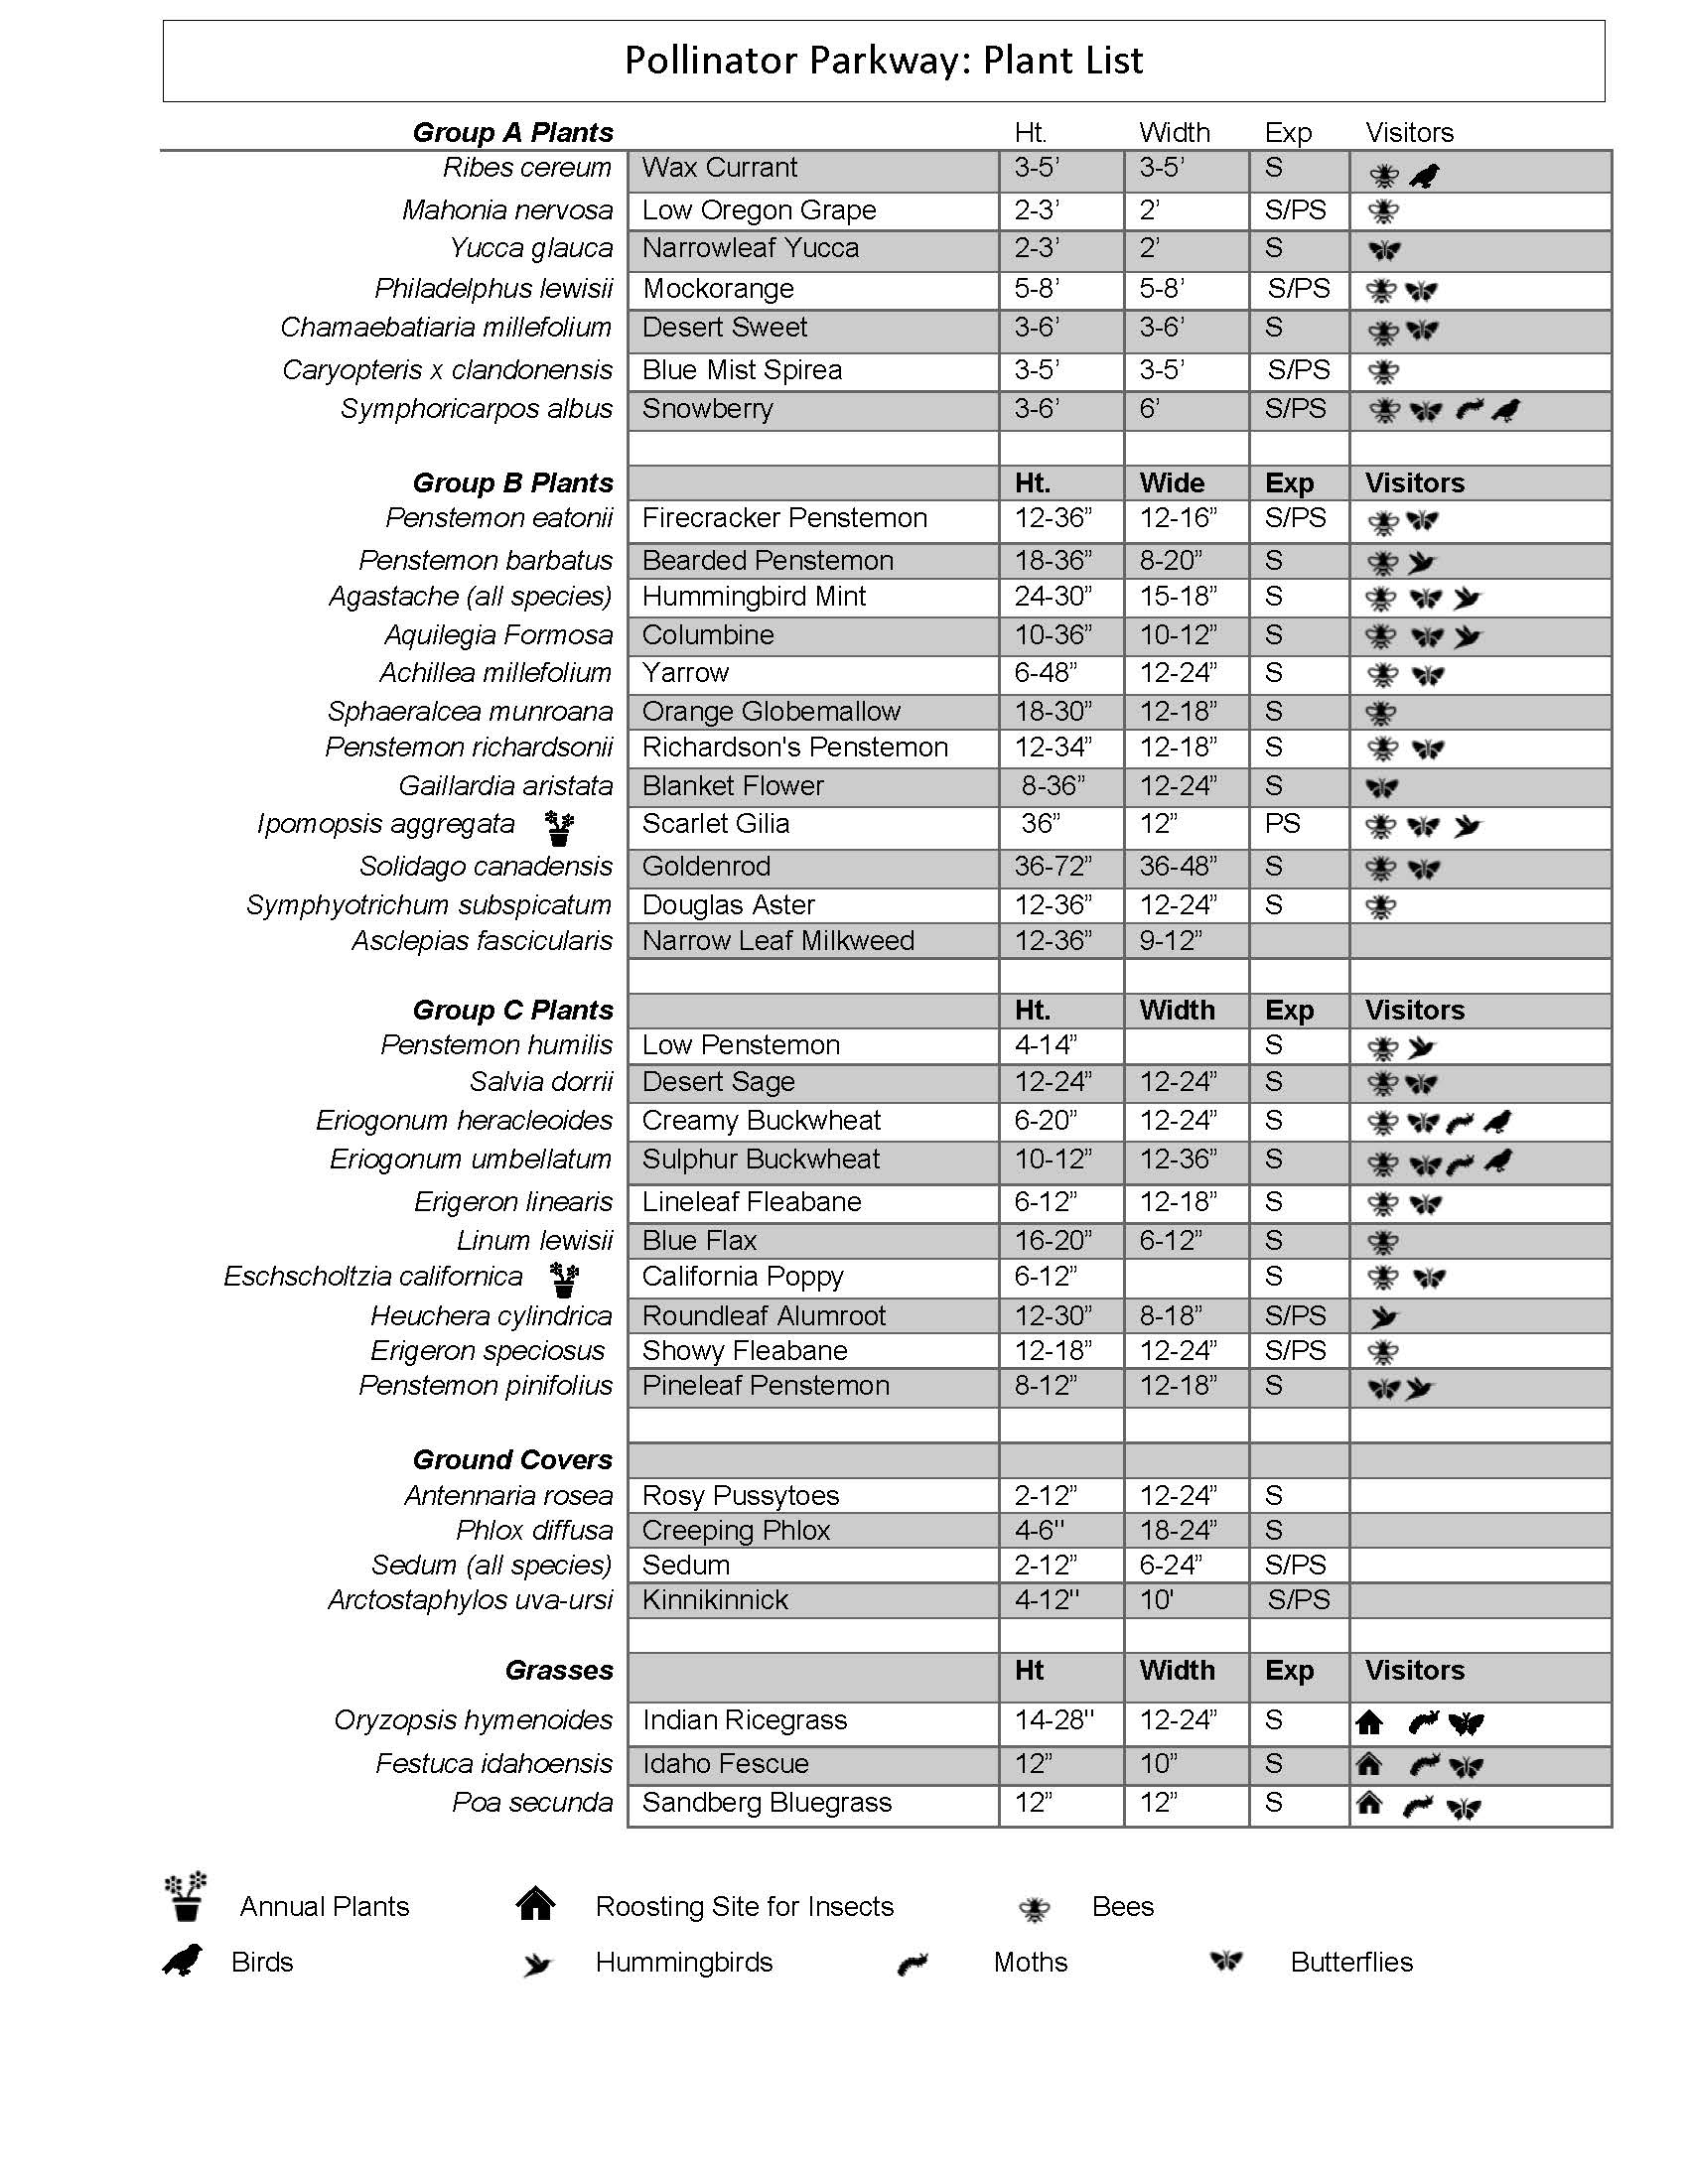
Download you copy by clicking this link: Pollinator Pathway Plant List
Pollinator Parkway Plant Bloom Period Chart
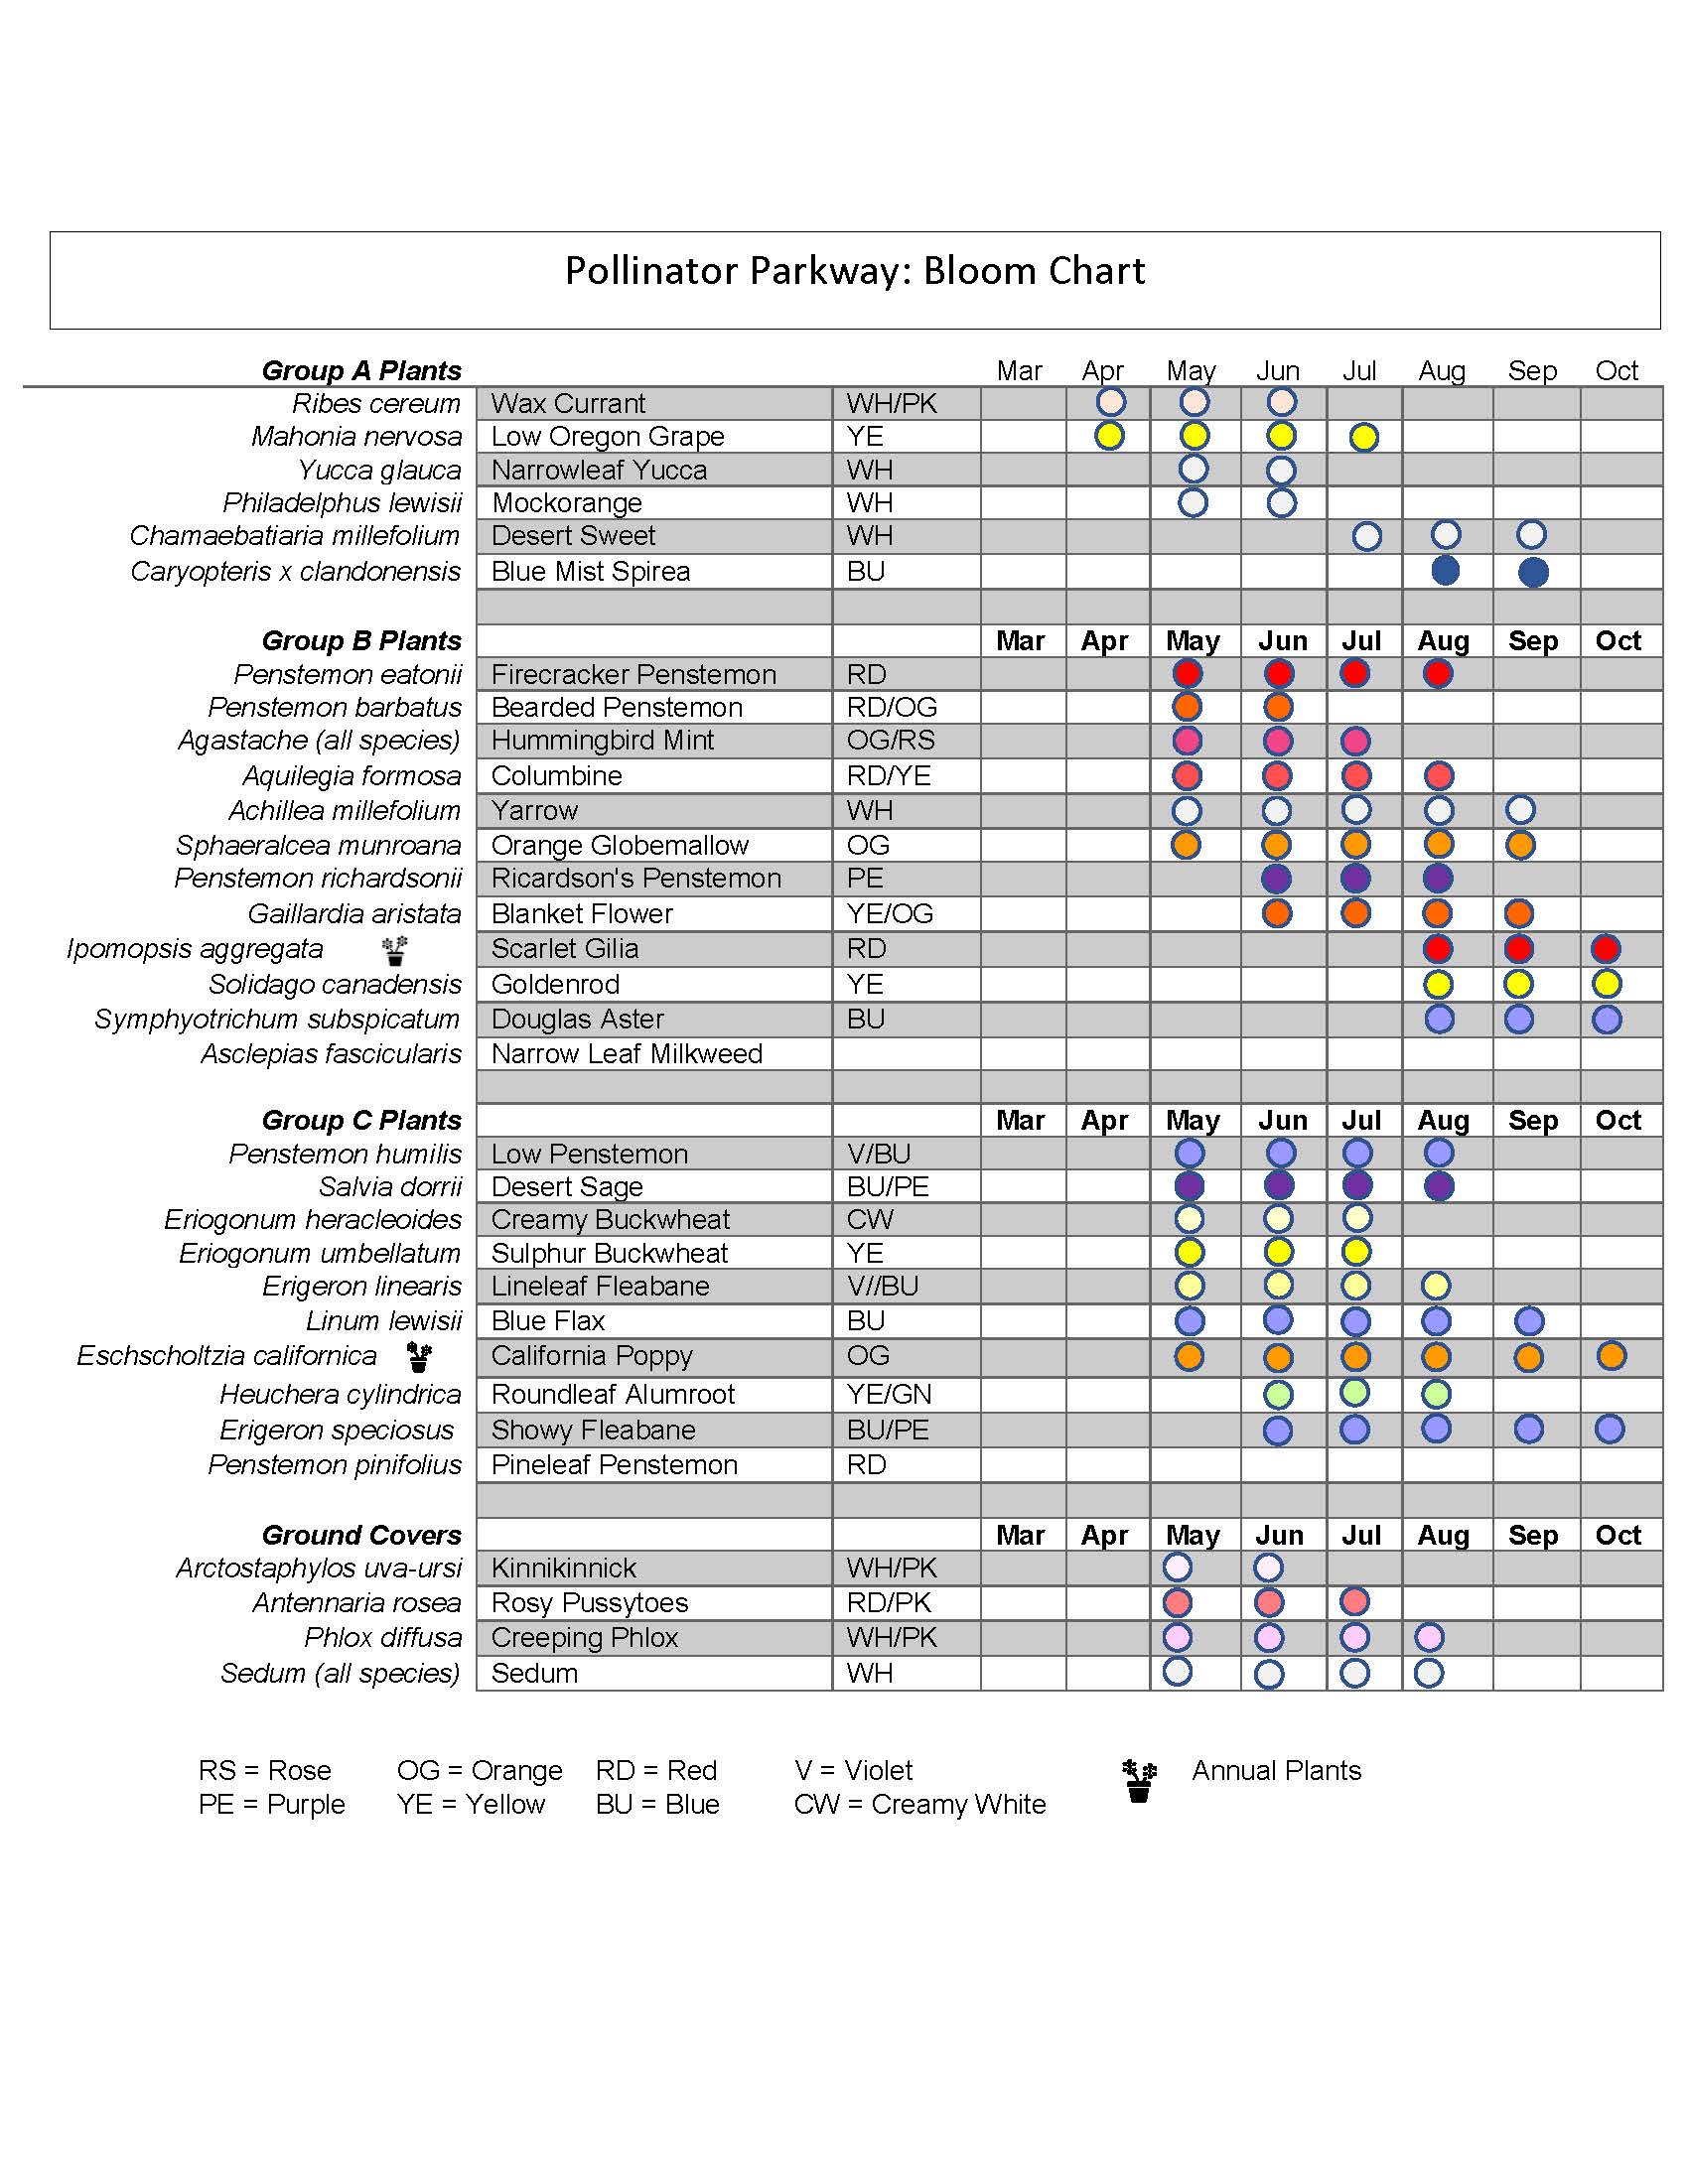
Download you copy by clicking this link: Pollinator Pathway Bloom Chart
REMOVING SOD AND CREATING A SUBGRADE
Sod Removal

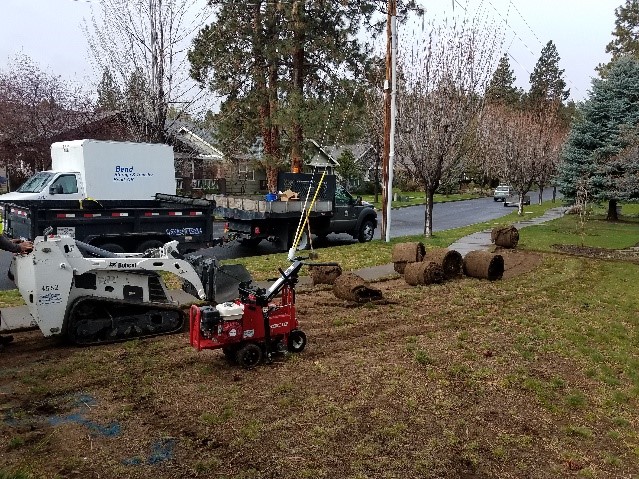
Before any type of excavation begins dial 811 to request an underground utility locate. Removing the sod and creating a functional subgrade can be physically challenging, but is the foundation for the entire project. For larger areas, the use of a powered sod cutter is generally the easiest way to remove an existing lawn. Be prepared to remove and recycle a significant amount of material. Just 100 square feet of sod can generate a cubic yard of material weighing nearly 2,000 lbs. Sod removal around tree roots may need to be done by hand or other means to avoid root damage.
An alternative way to remove sod is to … the lasagna method. A creative and organic way to compost the turf in place while improving soil structure at the same time. This method will take more time and likely needed to be initiated a season prior to planting due to our high desert climate.
Soil and Sub-grade
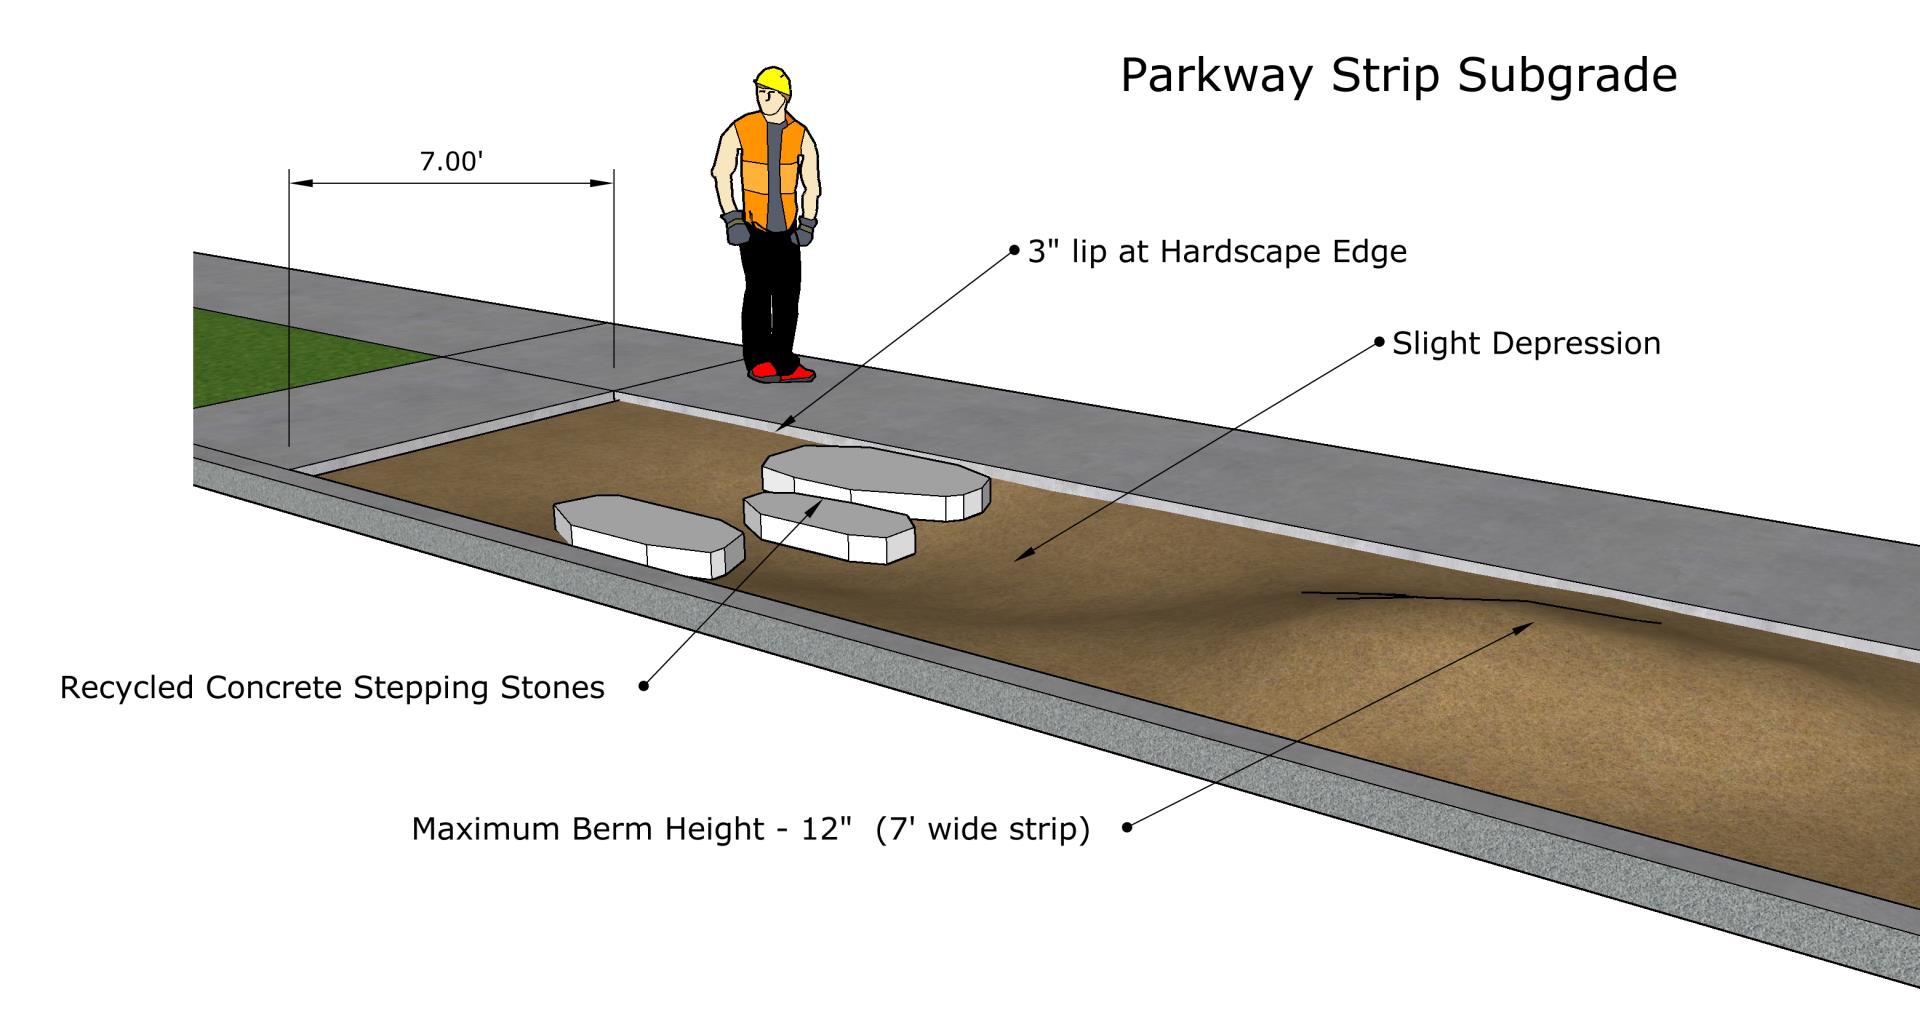
The subgrade, or grade before planting and mulching, should mirror the projected finish grade and be 2-3 inches lower when meeting the surrounding sidewalk and curb line. Avoid contour grading or mounding at a slope greater than one foot of rise for every four feet of distance. However, gentle sloping between mounding and depressed areas can provide visual interest, mimic natural landscape undulations and prevent stormwater from entering the roadway.
Native plants will do fine in Central Oregon soils without amendment, however soils in parkway strips can be limiting due to compaction, contamination, and the general process of building a roadway. In extreme examples, breaking up compaction and adding organic matter is sure way to improve soil structure.
|
Width of Planter
|
Recommended Maximum Berm Height |
| 1 to 3' |
None |
| 3' to 5' |
6" |
| 5' to 8' |
12" |
| 8' to 12' |
18" |
Parkway Strip Subgrade
CONVERTING TO DRIP IRRIGATION
Converting overhead irrigation to drip irrigation is a smart choice for a Pollinator Parkway landscape. Drip irrigation is more efficient, conserves water, and will go a long way in eliminating water waste. Installed correctly, point source or inline drip irrigation applies water directly to the root zone where water is needed. In the challenging environment of a parkway strip landscape, even the heartiest plants will benefit from periodic rewetting.
Irrigation manufacturers offer several drip irrigation conversion kits that are readily available and marketed toward the do-it-yourself crowd. Conversion kits should include pressure regulation and filtration to keep drip emitters from clogging. Some conversion kits are more expansive and offer drip tubing, drip emitters, and an end cap for flushing or blowing out the drip tubing.
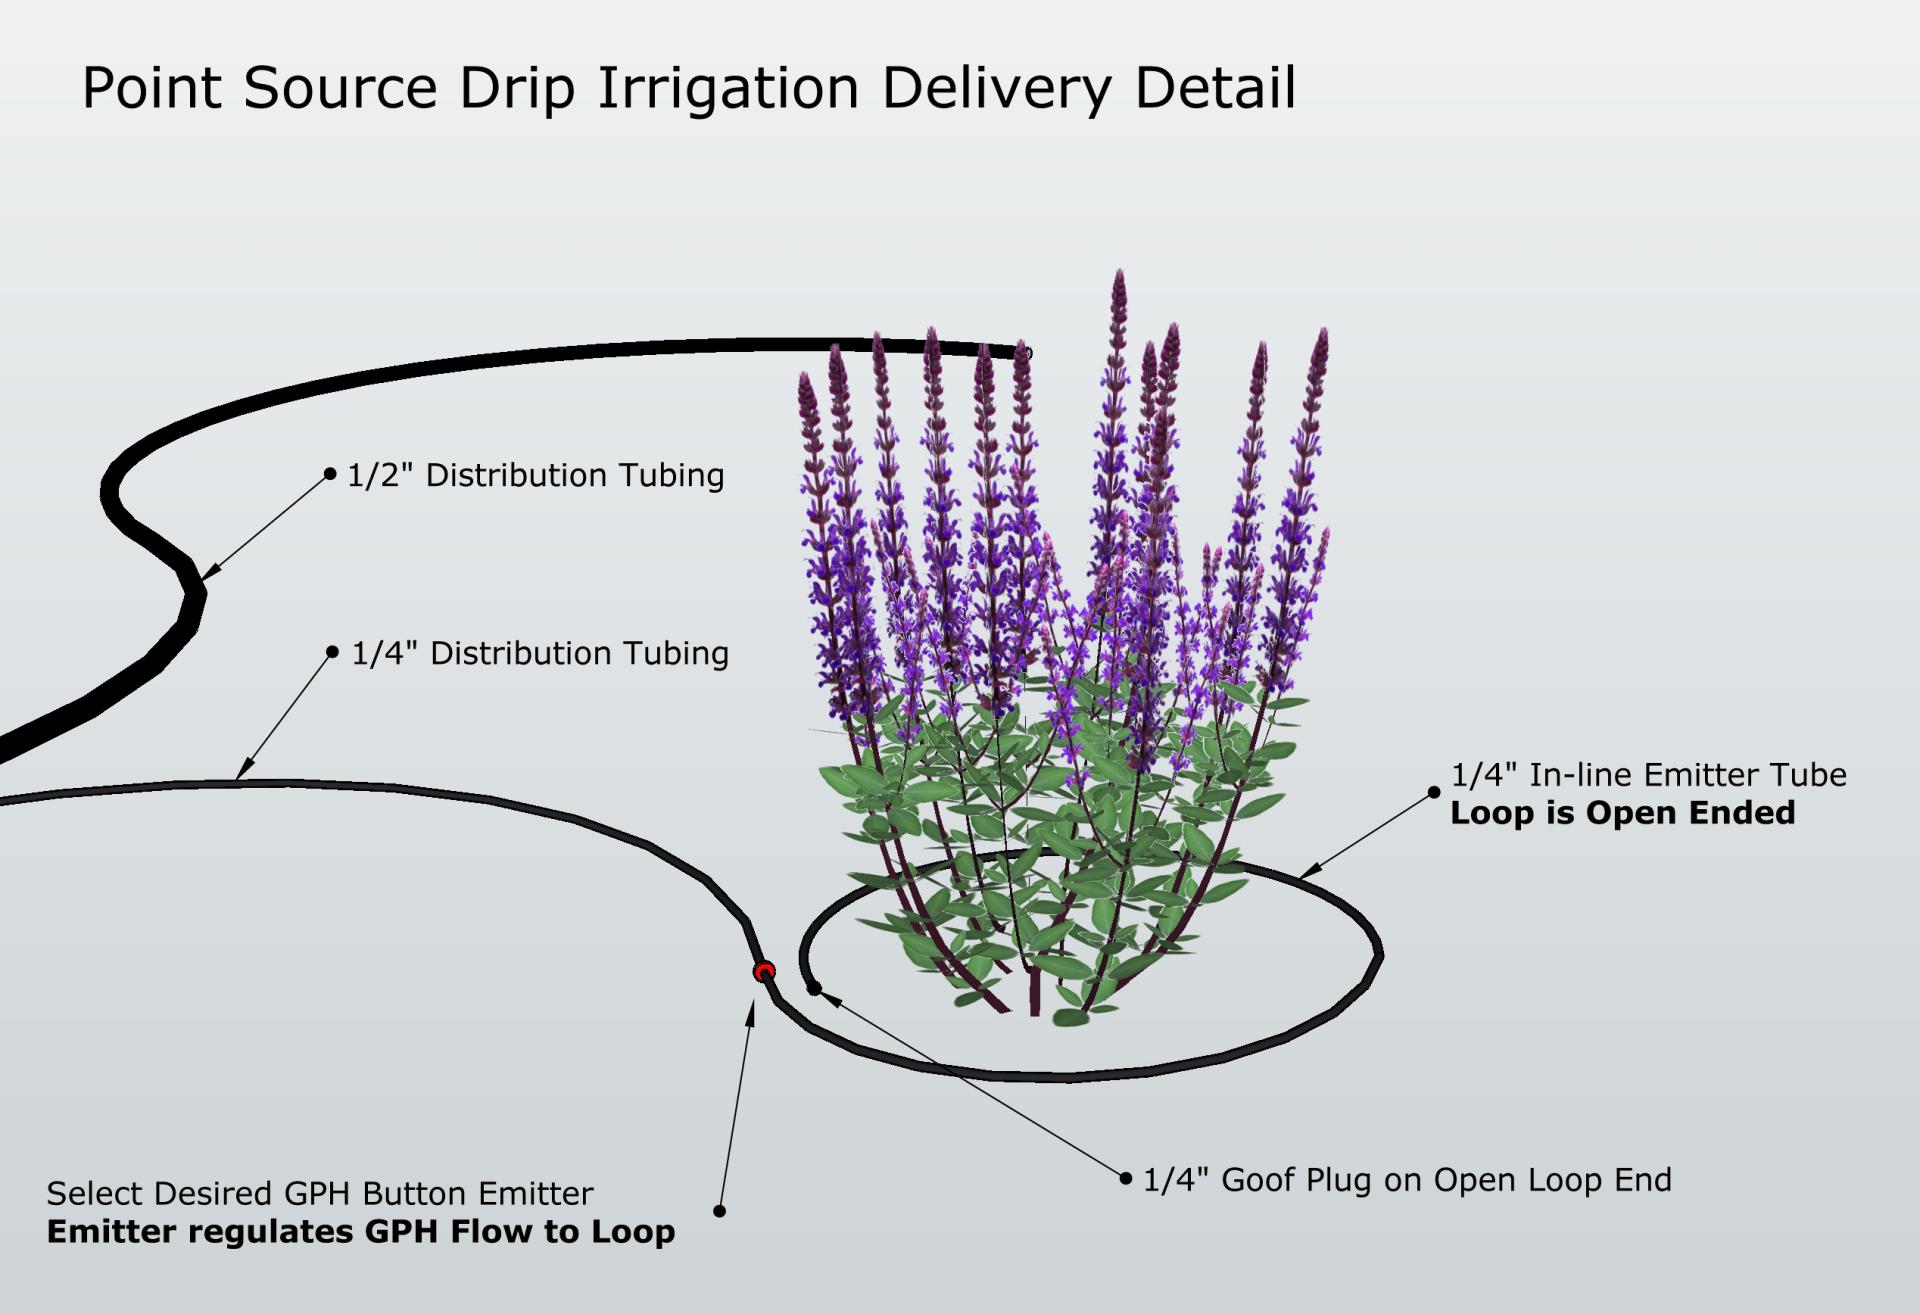
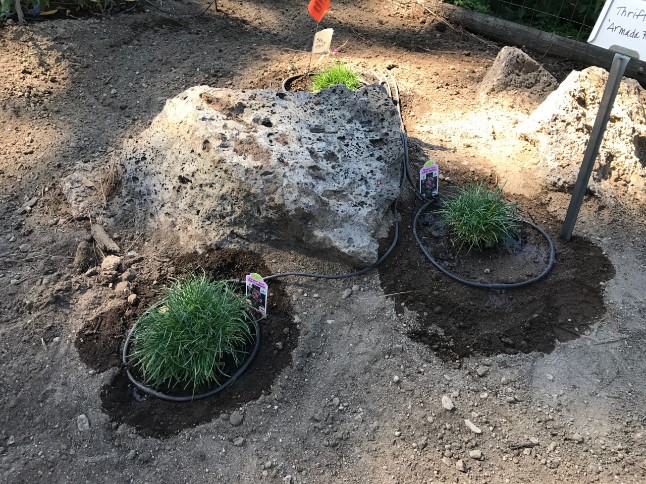
Choose between point source and inline drip irrigation. Point source drip irrigation is excellent for parkway strips with a lower planting density. Point source water is delivered directly to plants, leaving areas between dry and with less weed growth. Inline drip is excellent for a higher density of plantings. Once established, high-density plantings will reduce weed growth through competition and by shading the soil surface where weeds require sunlight to take hold.
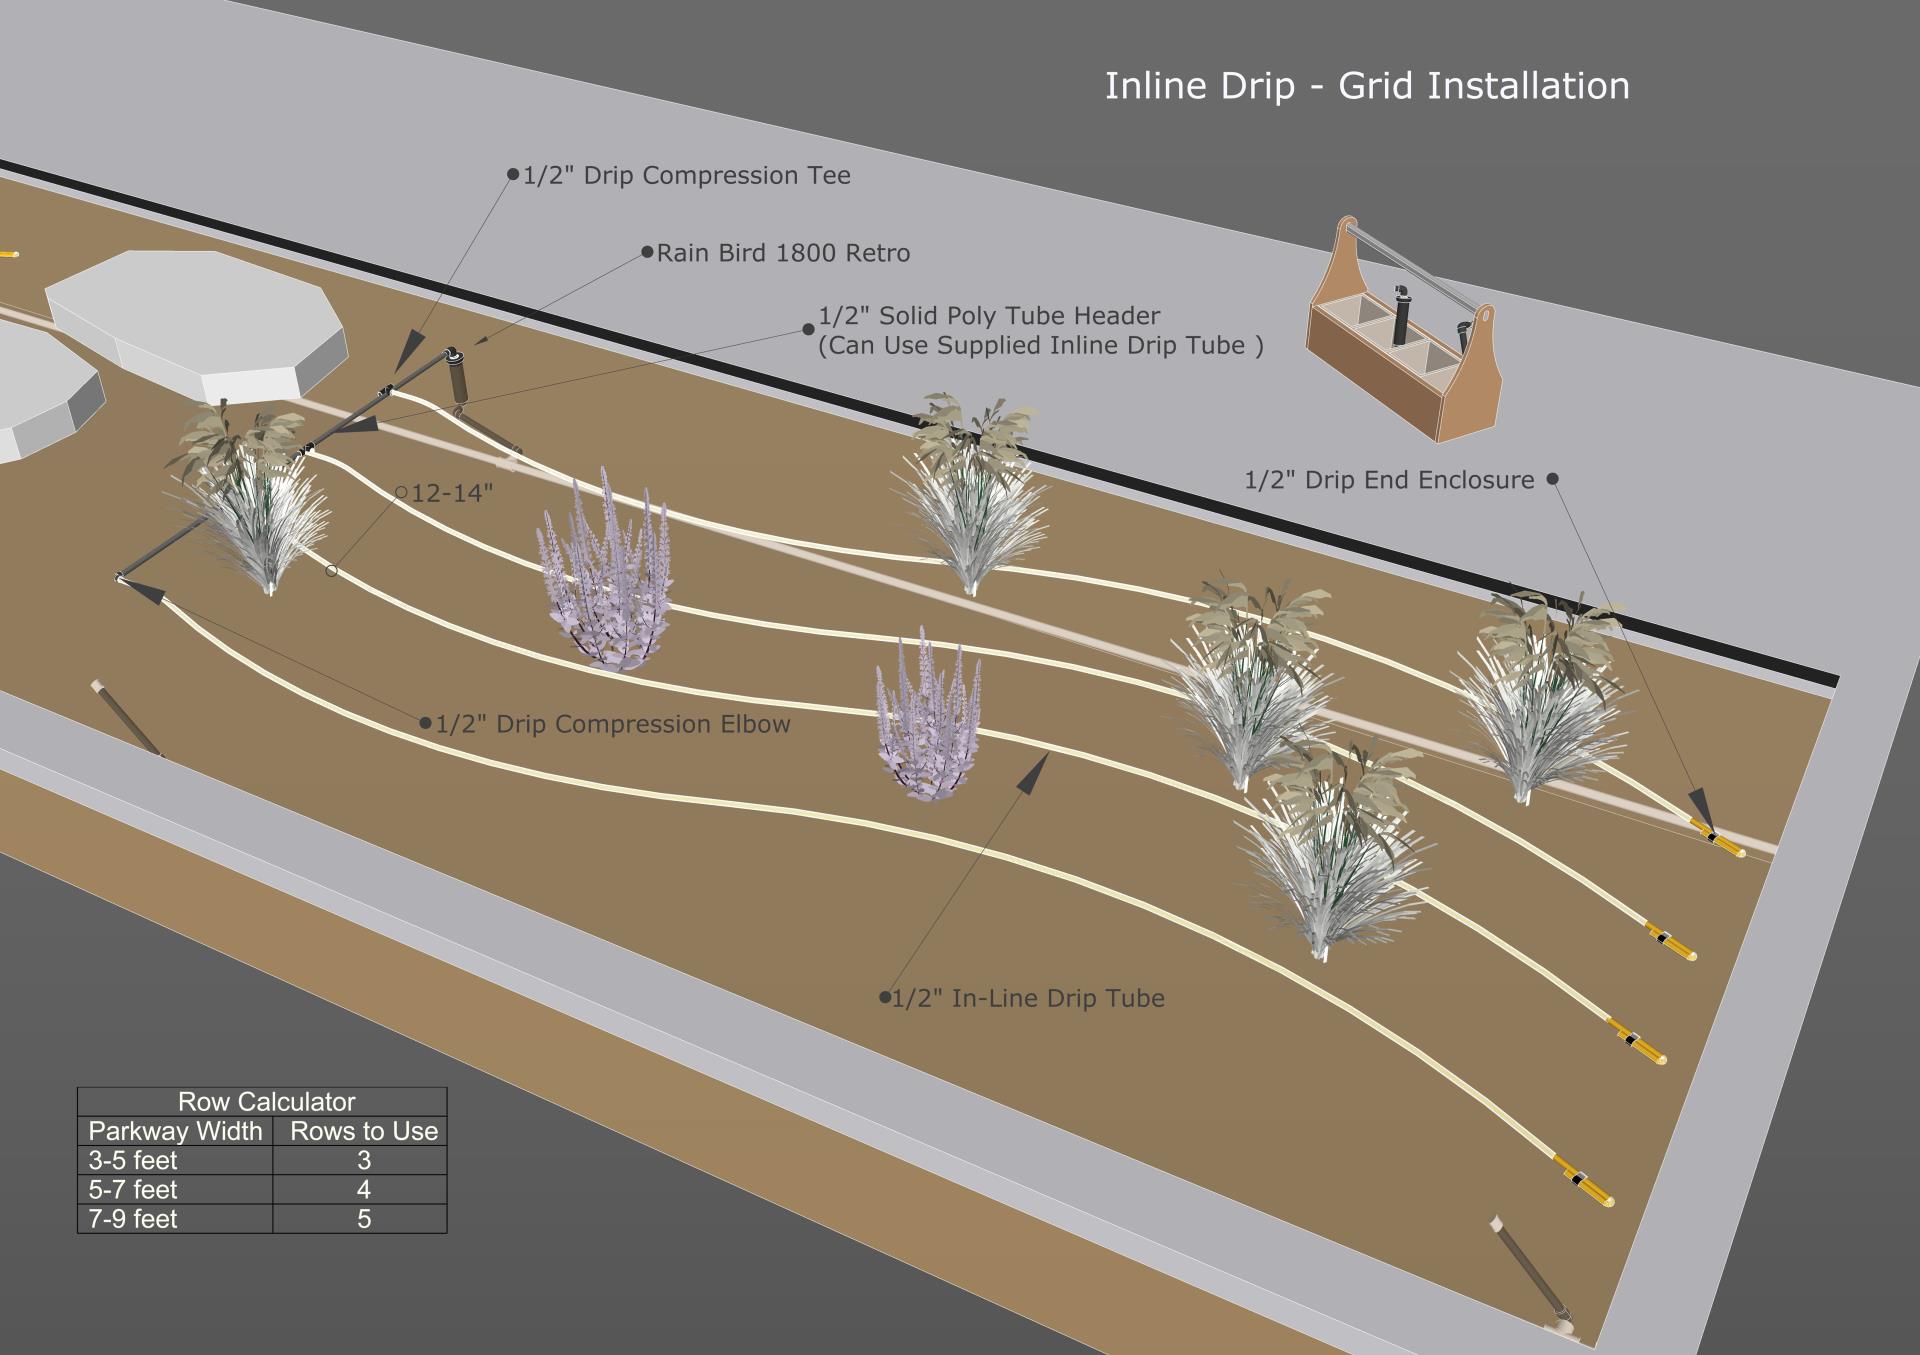
Creating a source and connecting drip irrigation
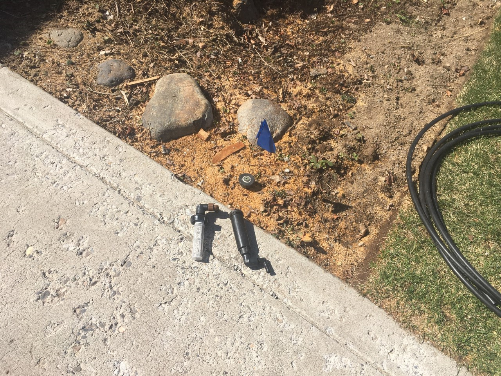
1. Locate all existing sprinklers in irrigation zone you want to convert
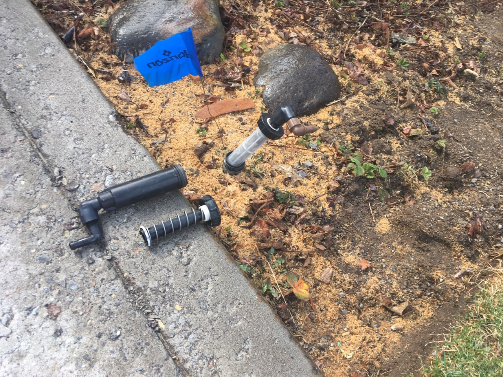
2. Choose a location to install the conversion device and cap off all remaining sprinklers.
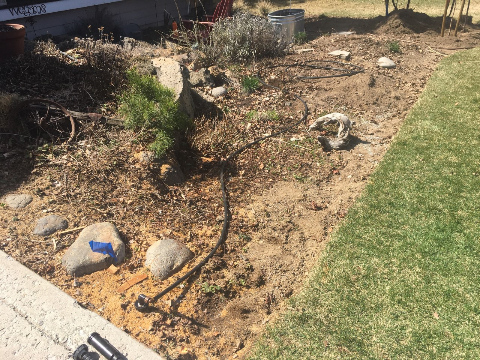
3. Connect In-line or Point Source irrigation to the conversion device.
Point Source Drip Irrigation
Planting and Grow In
To plant, start by excavating a hole 2-3 times the size of the plant container. If soil amending is needed, thoroughly incorporate composted material at a rate of one third amendment to two thirds excavated soil. Fill the hole with water and let drain before planting; this will prevent the surrounding soil from “pulling” water out of the root ball. Place the plant in the hole so the crown of the plant is slightly above the surrounding grade. Back fill and tamp lightly to remove voids. Form a small basin around the plant and water in thoroughly
Mycorrhizal fungi can be supplemented to new plantings to improve drought resistance and nutrient uptake. Mycorrhiza are beneficial fungi that form a symbiotic relationship with the root systems of plants; effectively increasing the amount of water and nutrients host plants can adsorb.
